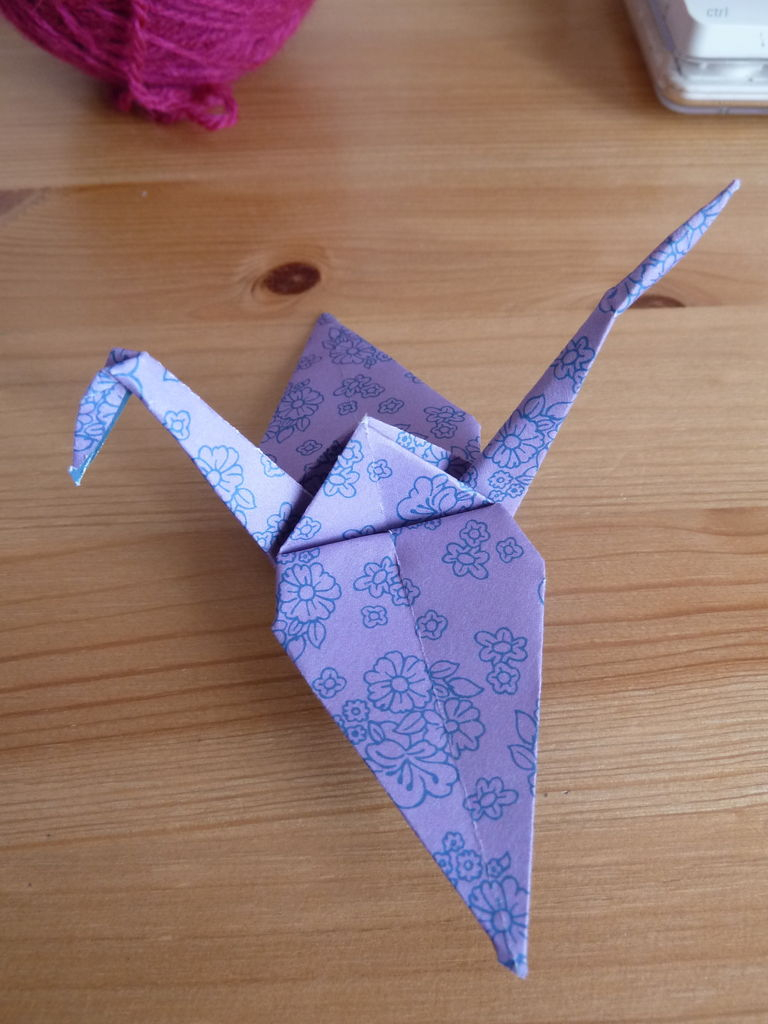
Following an origami crane instruction will help you to get the proper one. To start the origami, take a fresh origami paper make the color side facing toward you. Make an X-mark line diagonally on the colored side. Bring the plain side towards you and make a plus mark line. The lines or creases is done and make a two-level diamond out of it. The next step is to make a crease by folding the bottom part of the paper. Then, do the same creasing process on the top part.
The next part of this origami crane instruction is quite tricky. Pull the bottom part of the paper into the top part while you flatten both sides. Cover the plain side of the paper with a colored paper by pressing it inward. Do the precious tricky method on the other side. Once it is done, make another triangle from the bottom part and do the same on the other side.
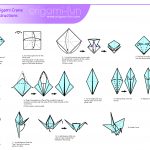
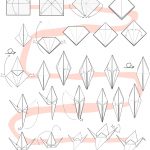
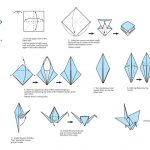
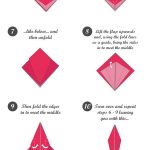

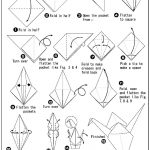
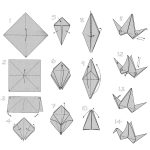


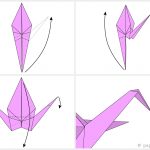


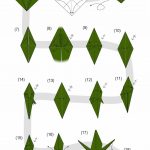


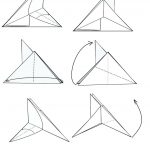


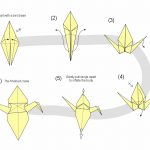


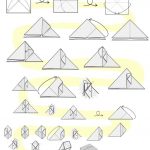

Now entering the last part of the origami crane instruction, fold both of the bottom parts of the paper upward. Crease it very well before you unfold it. Once the step is done. do the inside-reverse method on both legs. Do another inside reverse on one of the legs to make the head. The last step is to fold the triangles on the top down that act as the wings. The crane is done and you can make a new one.